
Eastchester’s capes carry their dormers like eyebrows over the front slope — small gabled rooms punched through the roof to bring light and headroom to the bedrooms upstairs. And a stain on the bedroom ceiling below a dormer is one of the most common roof complaints in post-war Westchester, and one of the most common calls our roof repair contractors in Eastchester take each winter. The shingles get blamed first, because they are what you can see from the street. But the shingles are rarely the culprit: the flashing is. The thin metal work sealing the joints where the dormer meets the roof is what actually keeps water out, and when it fails, the leak shows up indoors while the roof still looks fine from the curb. Star Construction INC has repaired roofs across the New York area since 2018; request a free, no-obligation estimate and we will climb up, look at the dormer properly, and tell you plainly what is failing and what it will take to fix it.
Why Dormers Are Leak-Prone by Design
A dormer is not a decoration added to a roof; it is a hole cut through one, and then framed back up with walls of its own. Every dormer punches three junctions through the slope: two side walls, called cheeks, and a front wall under the dormer’s own little roof. Each junction is a place where a roof plane meets a vertical wall, and each one is a joint that has to stay watertight while the two surfaces move differently with heat, cold and wind. Water running down the main slope does not glide past these joints; it is directed at them. The slope above the dormer gathers the flow and delivers it straight onto the cheeks, and the cheek is exactly where the step flashing has to catch it and hand it back onto the shingles, course by course. Cape roofs make the job harder still, because their pitches are low. Water moves slowly on a low slope, so it lingers longer at every transition and has more time to find a gap, and in winter the same low pitch holds snow that melts and refreezes into ice dams. An ice dam does not just sit on the roof; it backs meltwater uphill, under the shingles and straight into the transitions around the dormer, where gravity can no longer help it drain away. A dormer that never leaked in summer rain can start leaking in February for exactly this reason: the water is being pushed, not just falling.
The Five Warning Signs
1. A ceiling stain below the dormer. The classic sign: a brown ring or a damp patch on the ceiling or the wall directly beneath the dormer, often appearing after a storm and fading as it dries. The stain marks where water has travelled, not necessarily where it entered — water can run along a rafter before it drops — but a stain under a dormer points at the dormer first.
2. Paint bubbling on the dormer cheek inside. When the inside face of the cheek wall blisters, peels or bubbles, moisture is getting into the wall cavity itself, usually through failed cheek flashing. This is a later sign than a stain; it means the wall has been wet more than once.
3. Shingles at the cheek lifting or curling. Shingles that lift, curl or sit unevenly where they meet the cheek wall are often a symptom, not the cause: trapped moisture and repeated wetting break down the shingle and the fasteners beneath it. But lifted shingles also let wind drive rain further in, so the problem compounds.
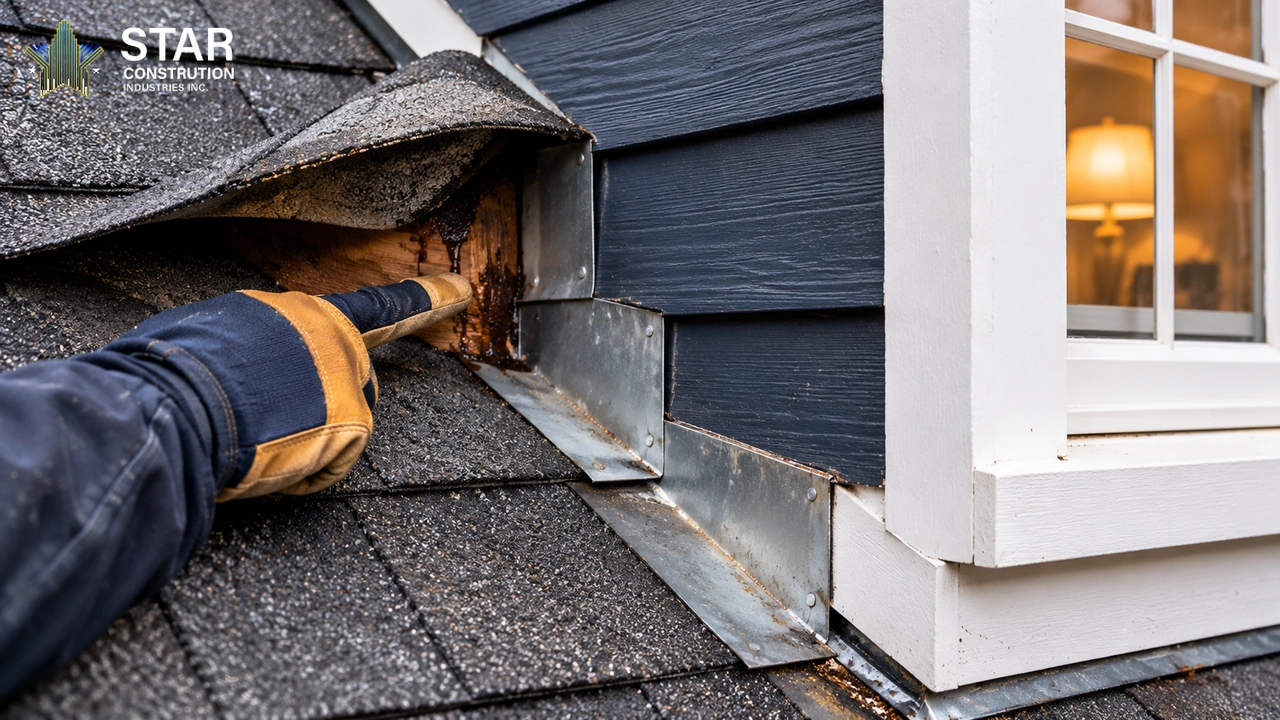
4. Rot at the dormer window sill. A soft, spongy sill or trim that a screwdriver sinks into means water has been sitting in the wood, usually because the apron flashing above the window or the cheek flashing beside it has been letting water behind the siding for some time. Rot does not happen in a season; it is the record of a leak that has been running a while.
5. Leaks only in wind-driven rain or after ice. A dormer that stays dry in ordinary rain but leaks when the wind drives rain against one side, or only after an ice dam forms, is telling you the failure is at a flashing joint. Water falling straight down the field of the roof does not behave that way; water pushed sideways into a joint, or backed uphill under a transition, does. Directional leaks are flashing leaks, and that is useful information, because it narrows the repair to the joints rather than the whole roof.
How a Proper Dormer Repair Is Done
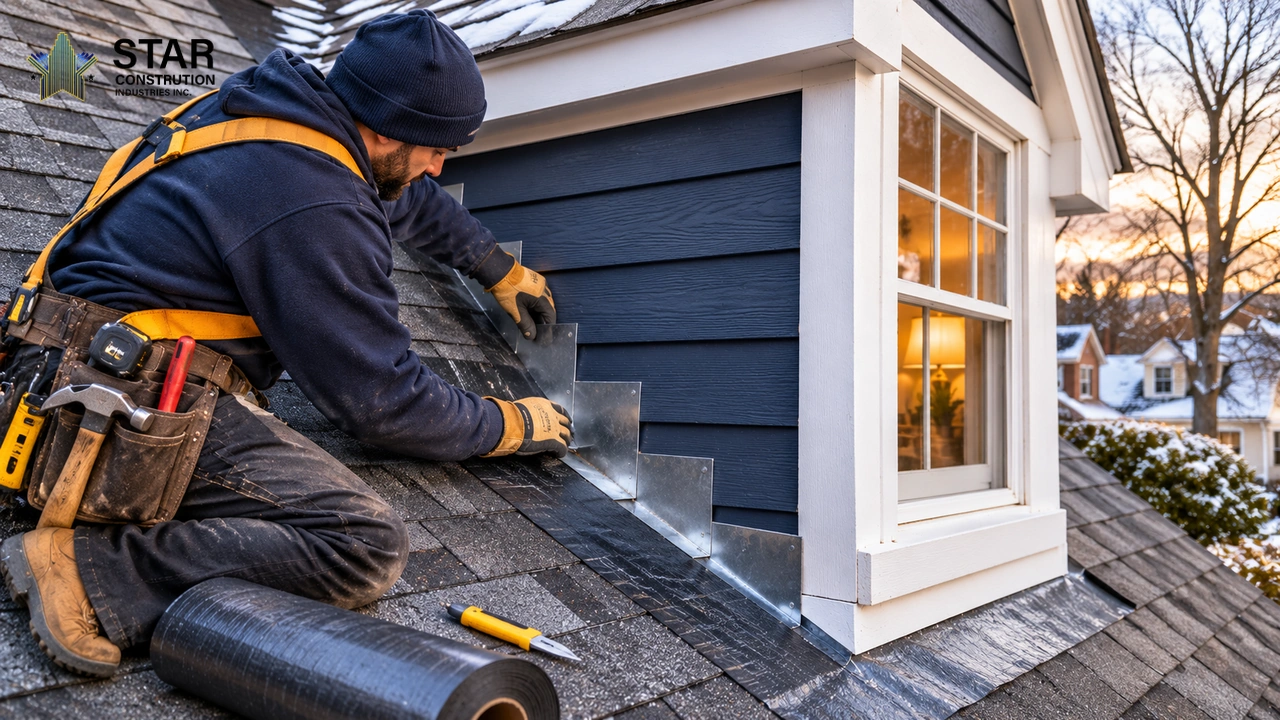
A proper dormer repair starts with taking things apart, not with a tube of sealant. Our roof repair and installation contractors strip the shingles back around the dormer — far enough to expose the full flashing runs, not just the few courses nearest the stain. What is underneath decides everything: the deck is checked for soft spots, the old flashing is removed, and any rotted wood found on opening is replaced rather than covered. Then the transitions are rebuilt in layers. Ice-and-water membrane is wrapped up the cheeks and across the front wall, lapped so that every seam sheds onto the layer below, because membrane is the last line of defense when wind drives water past the shingles. Over it goes the step flashing: individual L-shaped pieces, one per shingle course, woven up the cheek so that each piece overlaps the shingle below and is covered by the shingle above. That weaving is the whole craft — a single long L-piece bent along the cheek cannot follow the steps of the courses, face-nailing puts holes exactly where water runs, and caulk used as flashing is not flashing at all; it is a patch that will crack and let water behind it. The cheek siding is left with clearance above the roofline so it does not wick water up from the shingles, and the front wall gets its own apron flashing, lapped over the shingles below. Only then are new shingles laid back in, matched to the existing roof as closely as the courses allow. The roof flashing repair is the heart of the job; the shingles are the weather surface over it, not a substitute for it.
Reflash or Rebuild?
Not every leaking dormer needs rebuilding, and not every one can be saved by flashing alone. If the structure is sound — the cheeks are straight, the sill is solid, the dormer roof has not sagged — and only the flashing has failed, then a reflash is the right repair: strip back, membrane, step flashing, reshingle, and the dormer is good for the life of the surrounding roof. But if the cheeks or the sill have rotted, if the dormer roof is sagging, or if the junctions were built wrong from the start — no membrane under the siding, flashing run the wrong way, a cheek framed without clearance — then flashing over the problem only hides it, and a partial rebuild of the failed parts is the honest fix. Here is the uncomfortable truth that decides which one you need: nobody knows which until the shingles around the dormer come off and the wood underneath can be seen. Be wary of a firm quote given from the ground, or from the street with binoculars, because it is a guess dressed as a price. A proper estimate comes after the opening, not before it.

If a stain has appeared below one of your dormers, do not wait for it to dry out and forget it — dormer leaks do not heal, and the rot they feed only spreads. Star Construction INC has repaired dormers across the New York area since 2018; request a free, no-obligation estimate and we will inspect the dormer, photograph what we find, and explain the repair before any work is quoted. The areas we cover are on our service areas page.
Frequently Asked Questions
Why does my dormer only leak in some storms?
Because the leak is at a flashing joint, and flashing joints only fail under particular conditions. Ordinary rain falls straight down the slope and the shingles shed it. Wind-driven rain is pushed sideways into the cheek joints, and ice dams back meltwater uphill under the transitions. If your dormer leaks only when the wind comes from one direction, or only after snow and ice, the water is entering through a joint that ordinary rain never reaches — which is why the repair is at the flashing, not across the whole roof.
Can a dormer leak be fixed with caulk or roof cement?
Only as a very short-term patch, and usually at the cost of a bigger repair later. Caulk and roof cement crack with heat and cold, shrink, and trap water behind them once they fail — and because they are smeared over the joint, they hide the real failure from the next person who looks. A proper fix replaces the flashing itself: strip back, membrane, woven step flashing, reshingle. Anything less is buying a season, not a repair.
How long does a dormer reflash take?
A straightforward reflash of one dormer usually takes a day: strip back, membrane, step flashing, reshingle, tidy up. It takes longer if opening the dormer reveals rotted deck or sill wood, or if the dormer needs partial rebuilding — which is why an honest schedule is given after the opening, not before it. Most homes stay fully watertight overnight even on a two-day job, because the membrane goes on before the crew leaves.
Does dormer repair need a permit in Eastchester?
A like-for-like repair — new flashing and shingles on an unchanged dormer — is usually simpler and often does not need a permit, while a structural rebuild of the dormer generally does. The exact line depends on the scope of the work, so it is worth confirming with the town building department for your specific job before work starts; we can explain what the proposed work involves so you can ask the right question.
What does dormer leak repair cost?
It depends on scope: one dormer or several, how much flashing has to be replaced, whether rot is found once the shingles come off, and how closely the new shingles can be matched to the existing roof. A straightforward reflash and a partial rebuild are different jobs at different prices, which is why a firm figure only makes sense after the dormer has been opened and inspected. Request a free, no-obligation estimate and we will price the actual repair, not a guess.